According to Wikipedia, William Heath Robinson was an English cartoonist, illustrator and artist, best known for drawings of whimsically elaborate machines to achieve simple objectives. In the UK, the term “Heath Robinson contraption” gained dictionary recognition around 1912 and became part of popular language during the First World War 1914–1918 as a description of any unnecessarily complex and implausible contrivance. My name isn’t Heath Robinson but I came close today! Here’s the story.
I’ve basically got two incompatible things that need to play nicely together. One is an old HP Office Printer / Scanner and the other is some 35mm Kentmere B&W negatives that I developed a week or so ago. You can read about that experience in another of my recent blogs (check the February 2021 archive).
Now, as everyone knows, a flat bed office scanner doesn’t work particularly well with negatives. That’s because it needs a reflective surface to capture enough light into the sensor to record the item being scanned. Secondly, most office scanners, especially old ones like mine, can only scan at 600 DPI or, if you’re lucky, 1200 DPI so they are woefully inadequate for scanning small, semi transparent negatives. While for office work, 600 DPI is overkill, for film negatives, colour or B&W, the more resolution you can throw at it the better. To put this in perspective, the Epson Perfection V600 Photo, one of the leading brands of photo / negative scanners available today, can scan at 6400 DPI natively. That’s a huge difference to my measly 1200 DPI maximum and so my Heath Robinson approach to scanning negatives using the HP Envy is never going to procude stellar results. That being said, what I’m after here is simply to be able to view positive images of the film I’ve processed so that I can at least look at them in detail and choose any I want to process further. With regards a long term solution of transferring 35mm film into the digital realm, well, that’s another story!
OK, let’s look at my approach in a little more detail. First up, I made a circular cover, a bit like an old air raid shelter or pig pen, from carboard lined with metallic kitchen foil. The idea was to bounce the light from the scanner arm off the shiny surface and down on to the back of the negative. That was an epic failure in that it simply couldn’t reflect enough of the tiny amount of light on to the back of the negative to be useful. Other approaches I have read about, for example uisng an wedge might do better but I think the amount of light available is always going to be a limiting factor. Into the bin then with that idea!
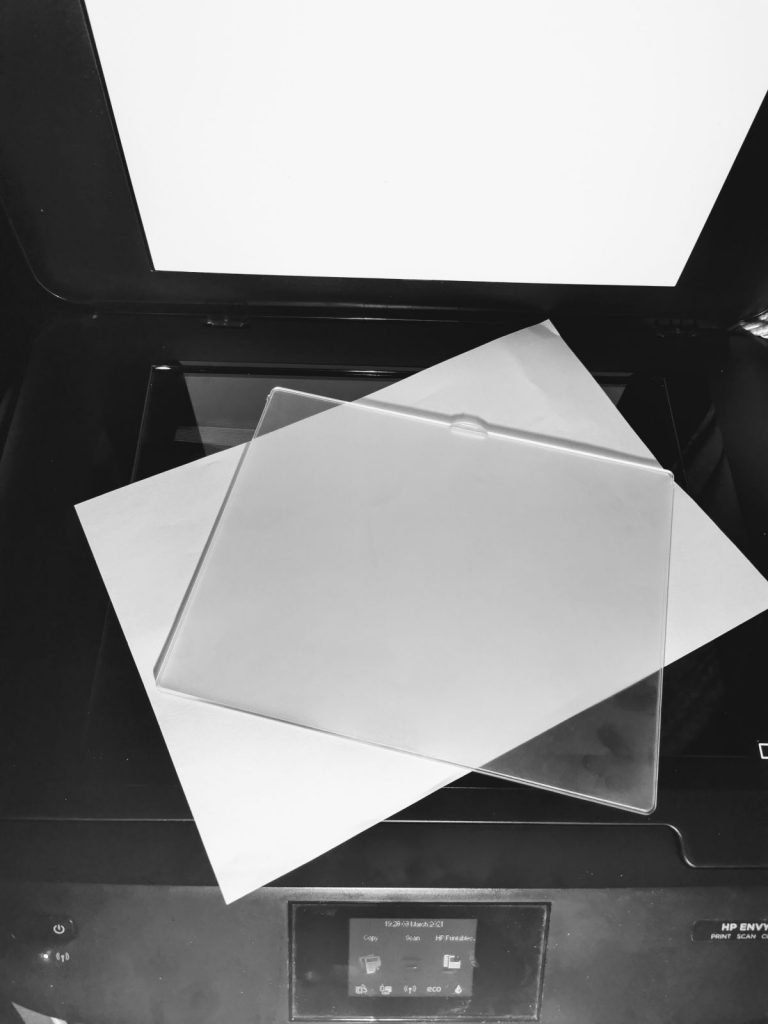
Second up was my idea of shinning a light from a desk lamp from above down on to the negative. This however tended to create patchy light, strong in some places, weak in others which blew out some frames while leaving others darker. Putting a piece of white paper over the negative to help diffuse the light so there weren’t any hotspots worked but as I was scanning a length of six 35mm images each time, the curl of the negative caused the paper to lift resulting in the scanned image being out of focus in places and still somewhat patchy with regards lighting. I needed something transparent, and heavy, to hold down the negative! Fortunately, I have some LED light panels and these have transparent diffusers ideally suited to this task. One of these was placed directly on top of the negative, curling edges duly negated, and on top of this I put a piece of 80sgm white paper to help diffuse the light still further. The light source at this stage was still from above. This improved things quite substantially so I thought I’d play around with this idea to see if I could improve on it still further.
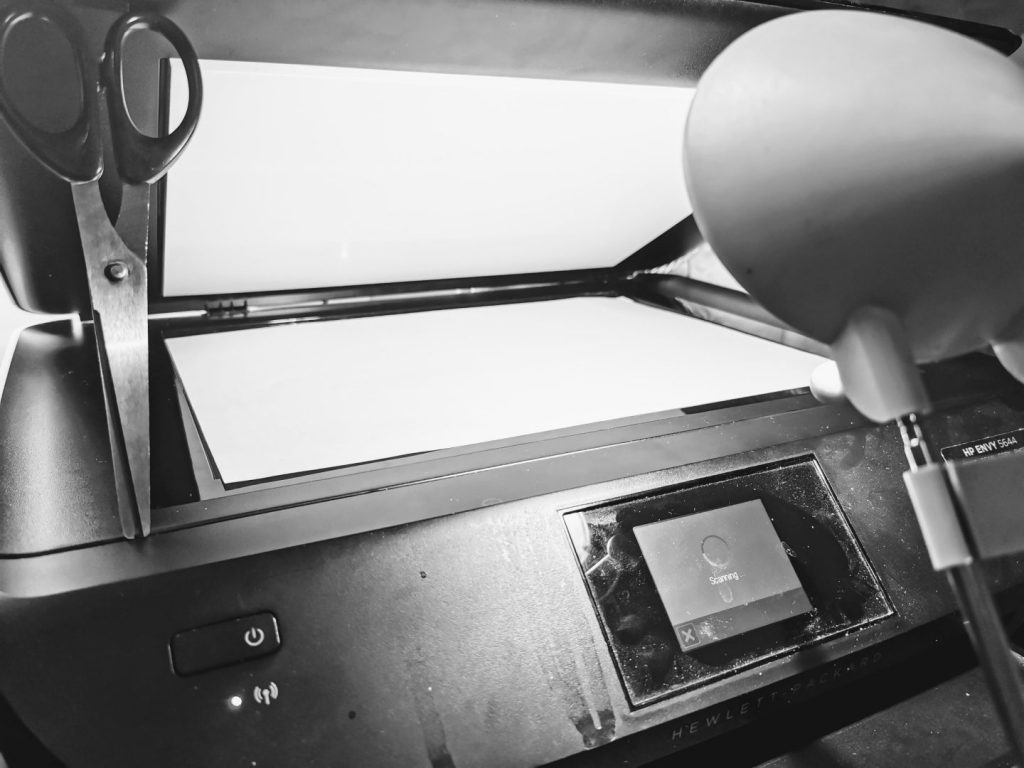
The final pieces of the jigsaw finally fell into place once I realised that I could use the white plastic sheet attached to the lid of the scanner as a handy reflector. This is there to put pressure on whatever you are scanning, an A4 sheet of paper for example, in order to hold it flat to the glass. Ths meant repositioning the light to the front of the scanner so that with the lid propped half open (with a pair of scissors), the light illuminated both the paper and the white panel in the lid equally. This had the effect of making the lighting much more uniform across the scanning area. Reversing the plastic sheet with the white paper on top of the negative and the plastic sheet on top of that actually made things worse so I changed back to what I had previously. The final eureka moment came though when I laid the film parallel to the moving scanner bar rather than at 90 degrees to it as I had been doing. This meant that I could reduce the scanning distance; distance equals time taken to scan, plus the light from front to back was more uniform than from side to side.
This final setup seemed to give me the best of all worlds, faster scanning at the higher 1200DPI resolution and more uniform lighting. We should not forget though that this is never going to be a long term film to digital solution, it’s simply great for seeing what I’ve captured in more detail than holding it up to the light. Unfortunately, unless I change the scanner to something better, the quality is still poor!! One thing I do suggest irrespective of anything else, is cleaning all of the surfaces in contact with the film negatives as any marks on any diffusers you may use, or on the glass of the scanner etc will likely appear on your digital image.
One immediate question of course is can this setup be improved to give more acceptable results. I think the answer to this is yes, especially if you have a newer and higher resolution office or photo scanner. I did a bit of surfing on google and newer scanners can routinely scan at 2400 DPI and above. That will definately improve your resulting digital image resolution albeit the actual scan may be slower. The difference between scanning at 600DPI and 1200DPI in my tests was quite considerable visually although you can still see the individual LED tracks (banding) on the digital image. It likely that newer designs of scanning arm now exist too which will remove or at least minimase this effect.
I also think that the paper plays a role in final image quality. I can definately see the structure of the paper on the image, this being caused by both reflection and by the light shining through the paper leaving the paper texture as an overlay. What I need is something translucent with ultrafine grain!! That or somehow remove this from the mix or move it further away from the negative.
Another possible improvement is to change the light source. I was using a small halogen table lamp with a 3″ non-diffused circular screen but if you had say a flat LED panel, especially with a diffuser, I imagine that the light could be made much more uniform and brightness better controlled. A daylight colour bulb would also help as mine is a warm white so white balance is warm when viewing the digitised image.
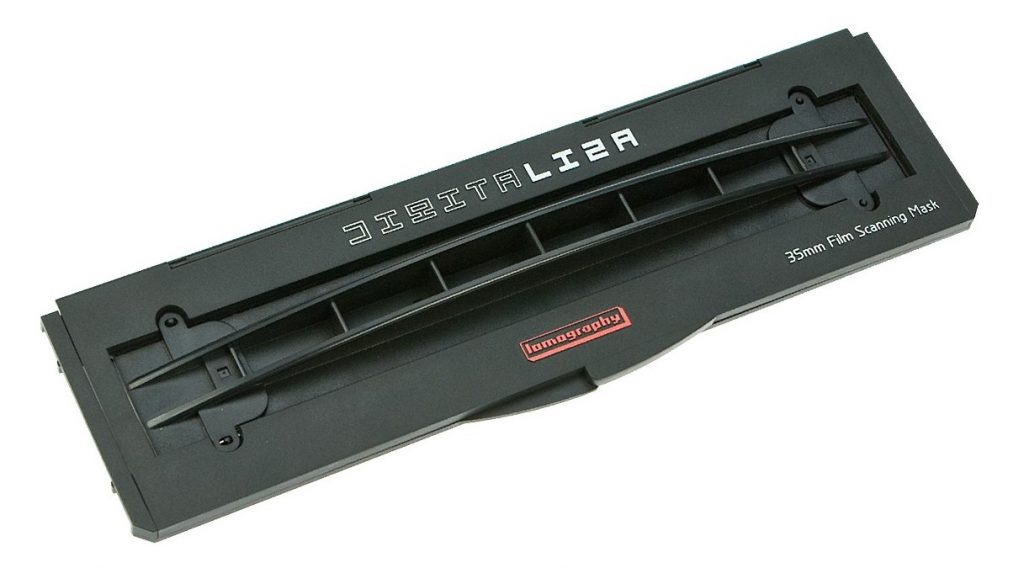
Finally, holding the 35mm film strip flat using something purpose made would reduce curling of the film and thereby improve focus accuracy. It would also remove the need to use the plastic sheet to hold the negative down. Having looked around on the web, and having failed to secure two going quite cheap on Ebay, I finally circumed and purchased a Lomography Scanning Mask from Speed Digital for £30 which I am awaiting delivery of – see image below. As soon as that arrives, I will repeat this experiment and see how much improvement I get using all of the above enhancements as well as tryout a few other ideas such as using a white screen and photographing the negatives suing my phone and an app such as Google Photo Scan which looks promising.
In the meantime, here are a couple of shots of my test setup. As you can see, all pretty basic stuff.


Pingback:Part 2: Digitising film with a camera setup! – The Creative Camera