A Quick Way to Edit a 35mm Colour Negative
In this article you will learn how to apply blend modes so the editing of a 35mm clour negative to create a white balanced colour positive The steps we will follow are as follows:
- Step 1 Develop the image to push the blacks and whites to the extremes of the histogram
- Step 2 Remove the Orange Colour Cast
- Step 3 Modifying the White Balance
- Step 4 Adjusting the image to taste
My preferred approach to digitising and editing a 35mm colour negative is slightly different to others I have seen on the internet. Without doubt the manual conversion process ie negative to positive is often tedious if you use a digital camera to capture the negative. While the photographic process can be streamlined, it is not fast and it does require some colour manipulations to remove the orange cast that all colour negatives exhibit. Here then I am going to talk about using Affinity Photo to quickly remove this orange cast and from there to fine tune the overall colours with a simple technique you may not have seen before. Read on.
For this process you will need a couple of things.
- A 35mm digital camera with a 1:1 macro lens
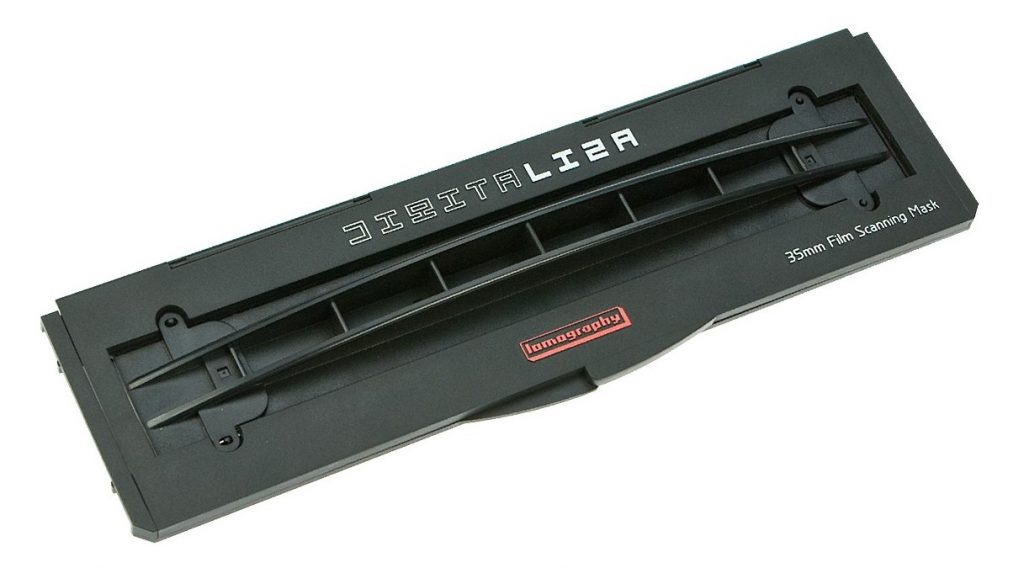
- A negative scanning mask – I use the Lomography Digitalisa 35mm mask
- Affnity Photo (or any other software that can apply Differential and Divide masks)
- A cup of tea or coffee
The process starts with loading up the Digitalisa Mask with your strip of negatives. This can hold up to six 35mm negatives so digitising is relatively quick as you can digitise six negatives in less that a minute. The process is simple – position, focus, capture and then move on to the next frame. Once you’ve captured your images, load your data card into your computer and load-up Affinity Photo (or whatever software you prefer to use).

Let’s start with an image captured using the above process.

Bear in mind that this image is 25 years old and probably taken on a relatively cheap film camera such as the little Olympus Trip XB41 AF shown below that I still own to this day. Image IQ therefore is never going to be top-notch so bear this in mind, it’s just an example of the process I use.

Step 1 Develop the image to push the blacks and whites to the extremes of the histogram
The first step in the process is to develop the image so that the blacks and whites are pushed to the extremes of the histogram. You can also better approximate the shadows and highlights too. Remember that with film, the highlights are generally rolled off so don’t push this job to the limits. Make sure that the whites and highlights are soft at the extremes.

The result now provides a good start point for the next step in the process which is removing the orange colour cast.
Step 2 Remove the Orange Colour Cast
The first thing you’ll notice is that the negatives and resulting digitised image has a strong orange cast. This is typical of colour negatives and something that you’ll have to learn to deal with. My approach here is simple and dosn’t involve playing with curves or using complex colour corrections so read on for a quick master-class in negative to positive image transformation.
A quick and easy way to remove a colour cast and invert the negative all in one operation is to use an overlay layer (rectangle option, fifth icon up on the left LHS menu) filled with sampled colour from the border with the blend mode set to Difference. Here’s the first step in that process, adding a box layer. This is currently white because the current selection is white but we’ll soon change that.

In this next step we simply sample the border colour as mentioned aboove using the dropper in the RHS panel. Click on the dropper and hold the RH mouse button down, drag the dropper to the area you want to sample and release the mouse button. The colour dot to the RHS of the dropper changes to the colour selected. Click on this dot and the fill colour changes to the sampled colour. Easy really.

Now all you need to do is set the layer properties for the box to DIFFERENCE and drag out the extremes of the box to cover the image. What you’ll then see is a colour positive image with the orange colou cast removed. The results won’t be perfect though because the White Balance will need adjusting but you now have something that you can work with. Here’s the result of the work so far.

Step 3 Modifying the White Balance
As previously mentioned, the only real problem now is that the white balance, which is always going to be a little off, so to fix this we just need to use the same trick as discussed above, i.e. you overlay a rectangle filled this time with something sampled from the image that should be white. Here it could be the plates, cups and saucers, or any of the women’s blouses as these are obviously all white. I chose the woman in the background who has a white blouse on – you can just see the lapels of the blouse. As soon as you sample this colour – you use the same process as outlined above but this time with the DIVIDE blend mode enable, you will see the result as shown below. Pretty good even if the colour is alittle too green overall. We’ll fix that next.
In this image I have also cropped it to remove the parts of the image I don’t need ie the borders as well as increased the brightness and contrast.

Step 4 Adjusting the image to taste
The final step then is to play around with tone, contrast, clarity and colour to suit your personal tastes. Here I also applied a vignette just to take out the harsh edges. Here’s the results of this final step in using Affinity Photo. Not bad really. You can see the various tools I appled to fine tune the image in the RH panel.

Although not entirely necessary I quite often apply a few final tweeks using Google Photos to my images because I like the simplicity of this tool when touching up an image.

It’s not perfect and yes, the image is incredibly noisy. It certainly wouldn’t win any competitions. It’s a snapshot of myself, and my beautiful wife (front row) with freinds from about 25 years ago. It’s nice to revisit the moment. In truth I could clean up some of the colour noise but to my mind this article is much more about process than of the end result. This ultra simple approach can be used on any negative where you can identify something white in the image. If not, you’ll have to play around with White Balance to get closer to the true colours in the image. That being said, pretty much most images have some white in them so you’ll get lucky most of the time.
In Conclusion
This process was to try to show you that you don’t need to be a wizard with curves in order to get good results when converting your colour negatives to colour positives. It’s not a quick process but it’s very doable providing you have software like Affinity Photo. Affinity Photo does most things really well and it’s so cheap as to make it a no brainer when you are putting together your editing toolbox. It’s easily my preferred editor for operations of this type.
Other Posts you might like
There are a number of posts on this website talking about film processing and editing so have a wander around if this interests you. Here’s a few you might like:
- Digitising Film | Natural window backlight vs Huawei P20 Pro Backlight
- Digitising Film | The final solution – almost!
- Part 1: Digitising film with an office scanner
- Part 2: Digitising film with a camera setup!
- 35mm Film Resurgence?
